Hand smocking is where fabric becomes language: tiny stitches fold plain cloth into texture, shape, and story. Each pleat is both a practical reinforcement and a signature of the maker – beautiful, delicate, and inherently variable. That very human quality makes controlling quality in hand-smocked clothing production a subtle art. You must preserve the craft’s individuality while ensuring garments meet consistent standards for fit, durability, and appearance. This article guides you through that balance. We’ll outline the practical checkpoints – from selecting compatible fabrics and threads, defining stitch counts and tension, to standardizing pattern placement and seam finishes – and show how clear documentation, sampling , and inspection routines can reduce variation without erasing artisanal character. You’ll also find methods for training and evaluating stitchers, setting acceptable tolerance ranges, and establishing corrective actions when pieces fall short.
Whether you manage a small atelier or coordinate production across multiple teams, understanding these systems turns quality control from a constraint into a tool: one that protects the integrity of hand smocking while allowing it to scale, satisfy customers, and stand up to everyday wear.
Table of Contents
- reading the Pleats: Anatomy of Hand Smocked Garments for Reliable Inspection
- Tension and Thread Choices That Prevent Puckering and Ensure Durable Smocking
- Practical Inspection Criteria and Sampling Protocols for Consistent Batch Acceptance
- Training and Visual Standards to Align Artisan Technique and Reduce Variation
- care, Repair, and documentation Practices That Preserve Quality Post Production
- Q&A
- Insights and Conclusions
Reading the Pleats: Anatomy of Hand Smocked Garments for Reliable Inspection
A smocked panel reads like a miniature landscape: ridges of folded fabric, valleys of stitches , and the subtle tension that holds them together. Inspectors learn to scan that landscape for rhythm - consistent pleat depth, even spacing, and a steady stitch path are the first signs of craft. Turn the garment and check the underside: tidy anchor rows, no stray threads, and reinforced entry/exit points tell you whether the piece was made to last. The fabric’s behavior around seams and yokes reveals whether pleats were trimmed, eased, or forced into place; look for smooth integration rather than abrupt puckers.
Use a quick checklist and a small defect guide when assessing batches to keep decisions objective:
- Pleat uniformity: equal height and spacing across the panel.
- Stitch integrity: tight, even stitches with no broken threads.
- Tension balance: consistent gathering of tension from front to back.
- Finish quality: clean backing, neat trims, and secure seam joins.
| Symptom | Likely Cause / Quick Action |
|---|---|
| Uneven pleats | inconsistent gathering - re-measure pleat guides |
| Popped stitches | Weak thread or overtension – replace threads, adjust tension |
| Edge puckering | Improper easing at seam – re-ease and restitch |
Tension and Thread Choices That Prevent Puckering and Ensure Durable Smocking
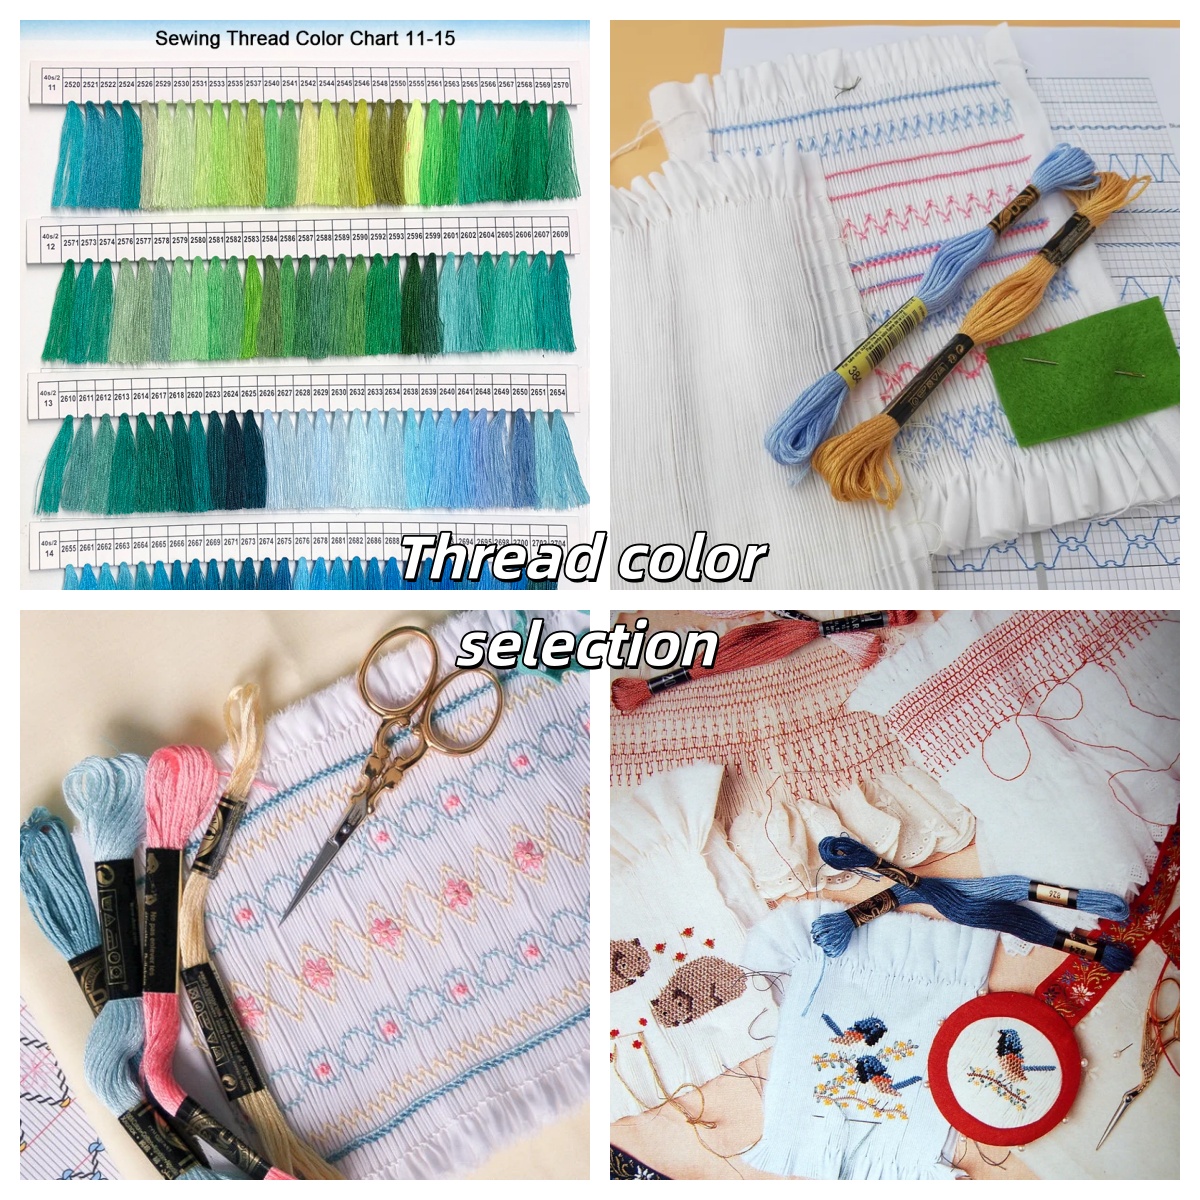
Smocking thrives on a delicate balance: too-tight stitches will pull the fabric into unwanted puckers, while too-loose stitches will lose the sculpted texture that defines hand-smocked garments. The easiest way to control that balance is to test, observe, and adjust-work a 4″ scrap in the same fabric, then tweak stitch length and thread weight until the gathers sit evenly. Use stronger, slightly thicker threads for the anchor rows and finer, smooth threads for the decorative rows so the smocking holds without bulging. Key practical rules to remember:
- Test on scraps with the same fabric and prep (washed/pressed).
- Match thread to fabric weight: lightweight fabrics prefer silk or fine cotton; medium/heavy fabrics suit polyester or cotton-wrapped polyester.
- Adjust gradually, tighten tension a notch at a time; measure puckering visually rather than by feel alone.
- Use a finer needle to reduce fabric trauma and prevent visible holes in delicate cloth.
Below is a quick reference to help you choose thread and tension settings that produce smooth gathers and long-lasting structure:
| Thread | Best for | Tension (relative) | Durability |
|---|---|---|---|
| Mercerized cotton (50-60 wt) | Light-medium cottons, crisp gathers | Medium | Good |
| Polyester (core-spun) | Everyday wear, stretchy fabrics | Medium-High | Excellent |
| Silk (fine) | Sheer, luxury pieces | Low-Medium | Good (delicate) |
| Cotton-wrapped polyester | Heavy garments, reinforcement rows | High | Very good |
Lock your work with small backstitches at row ends and finish anchor rows with a secure knot or a dab of fabric-safe sealant for extra longevity. When pressing, use a gentle steam and a pressing cloth. Set the shape without flattening the texture, and the smocking will remain crisp and resistant to puckering through years of wear.
Practical Inspection Criteria and Sampling Protocols for Consistent Batch Acceptance
Turn quality control into a tactile ritual: inspect every batch against a concise, prioritized checklist so decisions are fast and consistent. Focus on stitch uniformity, pleat/plate placement accuracy, smock density per inch, thread tension, tail length, and color/fabric consistency. Tolerances should be practical placement within ±4-6 mm, density variation under 10%, and no visible seam puckering or skipped smocks. Use templates and a lightbox for placement checks, and a simple pass/fail mark for each criterion so results are unambiguous.
Sampling must balance speed with statistical confidence. Adopt an AQL-based approach and always select pieces randomly across the lot (not just the top layer). Follow these quick steps for each inspection round:
- Determine lot size and target AQL (e.g., critical 1.5, major 2.5, minor 4.0).
- Draw samples randomly and perform visual/tactile checks on 100% of sampled units.
- Run destructive tests (seam strength, wash/colorfastness) on a subset.
- Record results on a standardized form and apply acceptance rules, rejecting on any critical defect.
Use a compact reference table for quick sampling decisions and keep it posted at each inspection station:
| Lot size | Sample count | Suggested AQL |
|---|---|---|
| 1-50 | 5 | 4.0 / 2.5 / 1.5 |
| 51-200 | 13 | 4.0 / 2.5 / 1.5 |
| 201-500 | 20 | 4.0 / 2.5 / 1.5 |
| >500 | 32 | 4.0 / 2.5 / 1.5 |
Institutionalize feedback: train inspectors on a shared rubric, rotate audit pairs to prevent drift, and log rejection reasons to feed pattern correction back to production. Small, repeatable checks beat ad-hoc inspections- consistency is the secret stitch that keeps every batch collectible.
Training and Visual Standards to Align Artisan Technique and Reduce Variation
Consistency begins with a shared visual language: train artisans with side-by-side comparisons of master samples, annotated photos, and short, repeatable drills that lock technique into muscle memory. Create bite-sized modules-10-15 minute micro-practice sessions- that focus on one element (tension, spacing, or placement) so skill enhancement is visible and fast. Encourage paired shadowing and quick peer critiques to normalize constructive feedback and to surface technique drift before it becomes habit.
Practical tools turn intuition into repeatable outcomes. Equip teams with simple, portable aids and clear documentation:
- Swatch standards (labeled with exact measurements and photographed from multiple angles)
- Visual checklists for each stage of the smocking process
- Measurement templates and rulers marked for key stitch intervals
- Daily calibration-a 5-minute team review of one master sample
These measures build a shared reference point so new and veteran artisans align on what “correct” looks like.
Translate visual expectations into measurable cues and keep them visible at the workstation. Use a simple reference table like the one below and update it as techniques evolve:
| Skill | Visual Cue | Acceptable Variation |
|---|---|---|
| Alignment | Even row symmetry | ±1 mm |
| Stitch Spacing | Uniform gap between stitches | 2.5 mm ±0.5 mm |
| Smocking Depth | Consistent fold depth | 6 mm ±1 mm |
Keep the loop tight: use periodic spot audits, quick photo comparisons, and a simple corrective action log so learning is continuous, and inconsistencies are caught early, turning craft intuition into dependable, repeatable quality.
Care, Repair, and Documentation Practices That Preserve Quality Post Production
Treat each piece like a living pattern: the best longevity comes from gentle handling and thoughtful storage. Start with a small colorfastness test before any wash, use a mild, pH-neutral detergent and cool water, and prefer hand-washing or a delicate cycle inside a mesh bag. Replace aggressive drying and ironing with low-heat steaming and reshape smocked panels while damp to preserve pleat memory. For storage, use acid-free tissue, breathable cotton bags, and flat stacking when possible to avoid distortion; cedar or lavender sachets deter pests without harsh chemicals.
- Washing: hand-wash cold, short soak, gentle squeeze-never wring.
- Drying: Dry flat on a towel away from direct sun; avoid tumble dryers.
- Pressing: Steam from the wrong side; use a pressing cloth over delicate threads.
- Storage: Rotate stock and keep a first-in/first-out system to reduce long-term stress.
Repairs should be restorative and reversible: document every intervention with photos, a simple stitch map, and material specs so future caretakers can reproduce or undo the work. Use matching fiber content and twist when replacing threads, and prefer hand techniques such as invisible darning or small whip reinforcement at stress points rather than broad patches. Maintain a single repair kit stocked with the exact thread codes, needle sizes, and replacement elastic types used in production, and log each repair to the garment’s ID.
- Documentation checklist: garment ID, batch number, before/after photos, repair code, thread color & supplier, date, and technician initials.
- Sample retention: keep a 2″ swatch of the main fabric and thread samples with the garment record.
| Issue | Repair | Record |
|---|---|---|
| Frayed pleat edge | Invisible hand-reinforce with a matching twist | Photo + R-102 |
| Broken elastic | Replace with original spec elastic, heat-seal end | Photo + E-208 |
| Discoloration | Spot-treat test area, color-correct if safe | Test log + C-305 |
Q&A
Q: What is hand smocking, and why does it need special quality control?
A: Hand smocking is a centuries-old embroidery technique that gathers fabric into tiny, decorative pleats held by embroidery stitches. As it blends structure and surface decoration, small variations in pleat spacing, tension, stitch size, or thread can dramatically change fit, appearance, and durability. Quality control preserves the artisan look while ensuring consistent fit, performance, and customer satisfaction.
Q: At what stages of production should quality checks occur?
A: Quality checks should be staged: pre-production (materials, patterns, samples), in-process (after pleating and during smocking), post-smocking (seam assembly, pressing), and final inspection (fit, finishes, packaging). Early checks prevent waste; ongoing checks maintain consistency.
Q: What should be included in pre-production checks?
A: Verify fabric (type, weight, grain, stretch), color lot matches, thread type and dye lot, pattern placement, markers for pleat lines, and a tech pack with clear measurements and tolerances. Create and approve a hand-smocked master sample (golden sample) for reference.
Q: How do you create an effective master sample?
A: The master sample should be made to the exact specifications for pleat spacing, stitch pattern, tension, and finished measurements. Photograph it from multiple angles, annotate critical points (e.g., distance from neckline to first pleat), and store it with the tech pack. Use it for operator training and line-side comparison.
Q: What tools help ensure consistent pleat spacing and stitch placement?
A: Use pleating templates, smocking rulers, marked bodices, light tables, and felt boards. For very detailed work, magnifying lamps and ergonomic frames help maintain evenly spaced pleats and uniform stitches.
Q: How do you control stitch size and tension in hand smocking?
A: Train artisans on consistent needle insertion depth and stitch length. Use the same thread type and needle size across the batch. Check a sample smock for stitch uniformity, and if tension varies, adjust operator technique or change thread/needle combos.
Q: What are the most common visible defects in hand-smocked garments?
A: Uneven pleat spacing, loose or missed stitches, puckering beyond intended smocking, misalignment with garment panels or pattern prints, inconsistent embroidery pattern, and color bleeding after wash.
Q: How can misalignment with patterned fabric be avoided?
A: Plan smocking placement on the pattern layout during marker making. Use clear markings on the fabric and a jig or template to align motifs. Approve a sample to confirm motifs sit correctly after pleating and smocking.
Q: How should fabrics be prepared before smocking?
A: Pre-wash or pre-shrink fabrics if the garment will be washed, or at least conduct shrinkage tests. Press and grain-check fabric, cut with consistent grain, and mark smocking lines accurately. Some fabrics benefit from light starch to stabilize pleating during smocking.
Q: What thread and needle choices are best for durability and appearance?
A: Match thread weight to the fabric and stitch motif-finer threads for lightweight fabrics, stronger threads for heavy-duty smocking. Use high-quality, colorfast embroidery threads and appropriate needle sizes to avoid holes or skipped stitches.
Q: How do you test colorfastness and shrinkage for smocked garments?
A: Run standard wash and perspiration tests on sample smocked pieces to check for bleeding, crocking, or distortion. Measure pre- and post-wash dimensions in smocked and non-smocked areas to assess stability. Adjust materials or dye lots if necessary.Q: What acceptance criteria should be set for hand-smocking quality?
A: Define tolerances for pleat spacing, stitch uniformity, finished garment measurements, and acceptable visual defects. Use the master sample as the visual benchmark. For production lots, adopt an agreed sampling plan (for example, per ISO 2859-1/AQL) with clear definitions of major, minor, and critical defects.
Q: How do you inspect smocking without damaging the work?
A: Inspect using gentle handling: spread the garment on a flat surface, use proper lighting, and compare directly with the master sample. For tension or stitch density checks, measure within smocked zones without stretching the fabric.
Q: What training improves consistency among smockers?
A: Hands-on training with the master sample, standard operating procedures for stitch sequence and technique, regular feedback sessions, and pairing novices with experienced artisans produce consistent results. Keep visual guides and short checklists at workstations.
Q: How should defects found during production be handled?
A: Segregate defective pieces, document the defect type and frequency, and determine if correction is possible (e.g., re-smocking a panel) or if the piece should be rejected. Feed root-cause findings back to the line material, process, or skill gap, and apply corrective actions.
Q: Can hand-smocked garments be machine-washed safely?
A: Many can, but it depends on fabric, thread, and technique. If washing is expected, test lab wash cycles and specify care labels accordingly. Recommend gentle cycles, detergent type, and whether the garment must be hand-washed or line-dried to preserve smocking.
Q: How do you scale quality control when increasing volume?
A: Standardize the master sample and SOPs, implement more frequent in-process checks, appoint trained QC leads on each line, and use sampling plans tied to batch sizes. Consider modularizing production (dedicated teams for pleating, smocking, assembly) to maintain focus and skill consistency.
Q: Are there tools or technologies that help maintain quality without removing the handmade aspect?
A: low-tech jigs, pleating templates, and light tables are essential. Digital tools-photo-based comparisons, measurement apps, and simple databases for defect tracking-can enhance consistency while keeping handwork central. Avoid overly mechanizing the smocking itself if the handmade appearance is desired.
Q: What documentation should accompany a production run?
A: Tech pack with annotated master sample photos, material and thread specs, dye lot records, operator batch logs, in-process inspection reports, corrective action records, and final inspection certificates. Keep records for traceability and continuous improvement.
Q: What should be on a final inspection checklist for hand-smocked garments?
A: – Compare to the master sample for overall appearance
– Pleat spacing and alignment within tolerance
– Stitch uniformity and completeness (no missed or loose stitches)
– Seam and construction quality (no open seams, consistent allowances)
– Color consistency and absence of staining
– Fit and finished measurements vs. spec sheet
– Care label and trimming/loose thread removal
– Packaging and folding standards
Q: How can you communicate quality expectations to buyers or retailers?
A: Provide clear specs, photos of the master sample, minimum inspection criteria, and accepted AQL/sampling plan. Share test results (shrinkage, colorfastness) and production documentation. Offer to perform pre-shipment inspections and provide certificates of compliance.
Q: What are reasonable tolerances, and when must you apply stricter standards?
A: Tolerances depend on the garment style and brand positioning. Simpl,e everyday pieces may accept wider tolerances; luxury or fitted garments require tighter control. Apply stricter standards to the neckline or garment front areas where smocking affects fit and appearance most critically.
Q: How do you balance artisanal variation with consistency?
A: Define which elements are flexible (minor variations in thread texture or slight stitch nuance) and which are non-negotiable (pleat spacing, alignment, finished measurements). Use the master sample to anchor acceptable artistic variation so you preserve craft while meeting quality expectations.
Q: What are the quick troubleshooting steps when a production run shows variability?
A: Stop the line, inspect the master sample, and pull recent pieces for comparison. Check materials and dye lots, verify operator assignments and recent changes (needle, thread), and look for environmental causes (humidity affecting fabric behavior). Implement immediate corrective measures and increase in-process checks until stable.
Q: Final takeaway – what’s the most significant thing about quality control in hand-smocked production?
A: Consistency anchored to a well-documented master sample, regular in-process checks, skilled operator training, and clear communication of tolerances. With those in place, you can protect the beauty of hand smocking while delivering reliable, wearable garments.
Insights and conclusions
Like the careful rhythm of a smocking needle, quality control in hand-smocked clothing is a deliberate sequence of small, consistent actions. Establish clear standards, train hands to meet them, inspect at defined points, and document results so good techniques are repeatable and defects are traceable. Combine thoughtful material selection, ergonomic work practices, and a culture that treats corrections as learning opportunities rather than blame to keep standards steady over time.
When these parts work together, the result is predictable: garments that carry the human touch without unpredictability. Maintaining that balance – honoring craftsmanship while applying systematic controls - protects the integrity of the product and the reputation of the maker. In practical terms, it means fewer surprises, better yields, and a clearer path to continuous improvement for any hand-smocking operation.