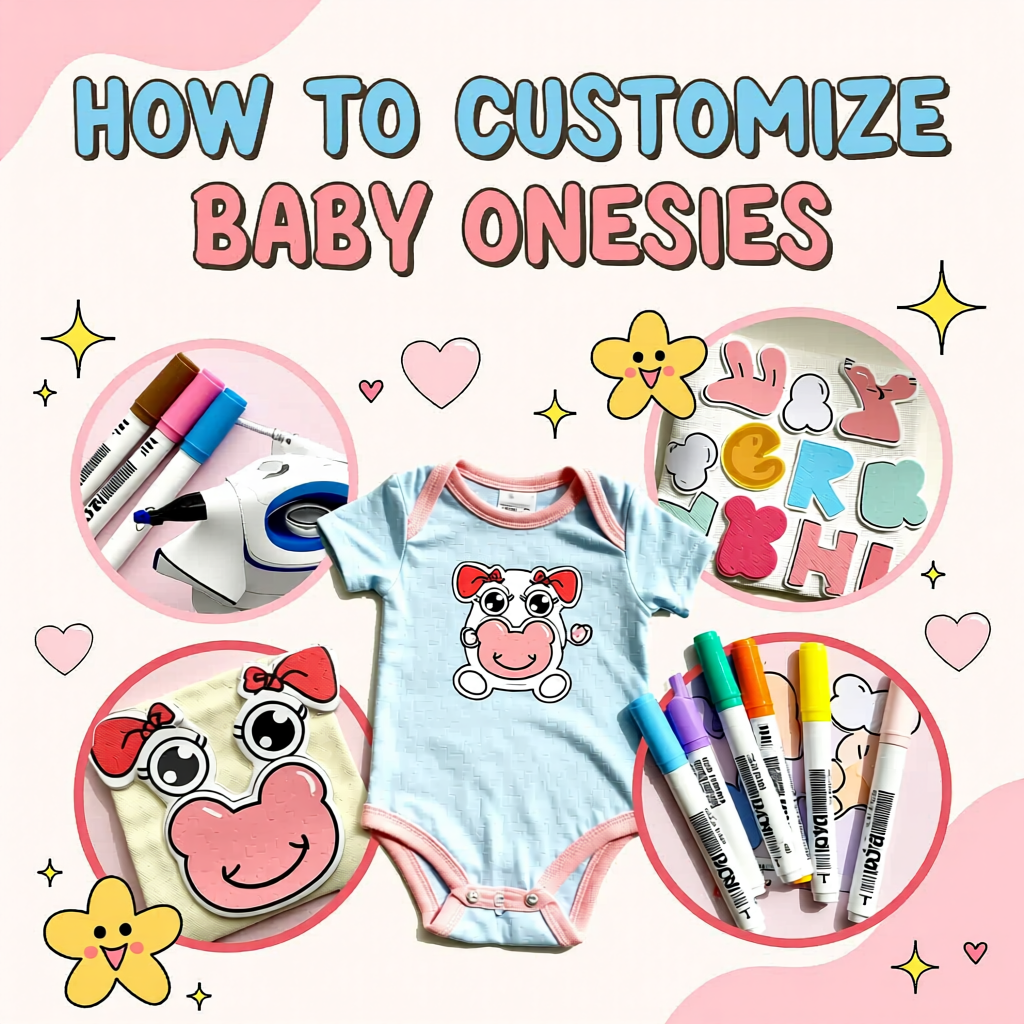
A plain onesie is more than a practical layer of clothing - it’s a tiny canvas ready to carry a name, a story, or a splash of color. Customizing baby onesies offers a way to personalize everyday garments, whether the goal is a unique gift, a durable hand-me-down, or a functional tweak that makes dressing easier. Approaches range from simple iron-on designs and fabric paints to sewing, embroidery, and appliqué, each with its own tools, time investment, and care requirements.
This article explores those options in practical detail: how to choose safe, washable materials; when to use heat-transfer vinyl versus stitching; and how to balance aesthetics with comfort and durability. Along the way, you’ll find step-by-step techniques, troubleshooting tips, and considerations for sizing and maintenance so your creations look good and stand up to regular use.
Read on to learn how to transform basic babywear into personalized keepsakes and useful additions to a little one’s wardrobe – thoughtfully, safely, and with techniques suited to your skill level.
Table of Contents
- Choosing Fabrics, Sizes, and Prep Tips for Smooth Customization
- Heat Transfer Vinyl and Iron-On Methods with Recommended Tools and Brands
- Applique, Embroidery, and Simple Sewing Tricks for Durable Detail
- Painting Stencils and Fabric Marker Techniques for Crisp Color That Lasts
- Safety, Washing, and Storage Guidelines to Keep Custom Onesies Soft and Safe
- Q&A
- Key takeaways
 Choosing Fabrics, Sizes, and Prep Tips for Smooth Customization

Pick fabrics that behave predictably when cut, washed, and decorated – this saves hours of rework. Natural fibers like 100% cotton and bamboo knits are forgiving, soft on baby skin, and take screen printing, fabric paint, and iron-ons well. Stretchy blends (cotton-spandex or jersey) are agreeable but require stiffer transfer media or pre-stretching when applying vinyl. Avoid heavy weaves or high-pile fabrics; they won’t lie flat, and designs will look distorted. quick reference:
- Cotton/organic Cotton: Best all-rounder for prints and paints.
- bamboo/modal: Luxurious feel; test adhesion first.
- Blends: Good fit-use stretch-kind methods.
Size choices determine both comfort and design placement, so plan artwork proportions before cutting or applying embellishments. Use this simple guide to match age ranges with common onesies sizes – remember every brand varies, so measure stretch and length against your template before finalizing the design.
| Label | age | Design Height (approx.) |
|---|---|---|
| Newborn | 0-3 weeks | 3-3.5 in |
| 0-3 months | 0-3 mo | 3.5-4 in |
| 3-6 months | 3-6 mo | 4-4.5 in |
| 6-12 months | 6-12 mo | 4.5-5 in |
Preparation is where smooth customization happens: prewash to remove finishes and shrinkage, iron flat to eliminate wrinkles, and always make a small test swatch. Use light-weight stabilizer or template paper for accurate placement and secure designs with low-tack heat-resistant tape. For best results, follow this quick checklist:
- Wash & dry on recommended settings before decorating.
- Iron flat and mark the centerline with fabric-safe chalk.
- Test your paint/transfer on scrap fabric of the same type.
- Use a stabilizer for prints on stretchy onesies to avoid puckering.
These small steps cut surprises and help every custom onesie feel like it was made to fit the moment.
Heat Transfer Vinyl and Iron-On Methods with Recommended Tools and Brands
Few things make a onesie sing like a crisp, smooth transfer-whether you choose heat-transfer vinyl or an iron-on sheet. Start by mirroring your design and using a good cutting mat so your cuts are clean; then weed carefully to avoid tiny islands. For household projects, a heavy-duty iron works in a pinch, but a dedicated heat press or a smart heat pad gives consistent temperature and pressure, which matters most for longevity. Remember to protect prints with a Teflon sheet or parchment paper when pressing to prevent scorch marks and glossy spots.
- Cutters: Cricut or Silhouette for precise cuts.
- Vinyl: Siser EasyWeed (everyday HTV), Oracal for specialty finishes.
- Heat tools: Cricut EasyPress or a compact heat press for even results.
- Accessories: Weeding hook, heat-resistant tape, and a Teflon sheet or butcher paper.
Application is a simple rhythm: preheat the fabric to remove moisture, align and tape the transfer, press with steady pressure, and cool as recommended. For care, flip the onesie inside out and wash on cold; skip the dryer whenever possible to preserve the adhesion and finish. Below is a quick comparison of go-to tools to get you started:
| Product | Best for | Quick tip |
|---|---|---|
| Siser EasyWeed | Everyday HTV | Flexible, easy to weed-low temp press. |
| Cricut EasyPress 2 | Small-batch pressing | Consistent heat for long-lasting bonds. |
| Weeding Tool Set | Detail work | Sharp hooks save time removing tiny pieces. |
Applique, Embroidery, and Simple Sewing Tricks for Durable Detail

Tiny fabric patches and stitched motifs are the fastest way to give a plain onesie personality while making sure the decorations last. Start with small felt or cotton shapes backed with a lightweight interfacing, hold them in place with fabric glue, then secure with a tight zigzag or small blanket stitch. For knits, add a stabilizer and use a ballpoint needle to avoid runs; clip curves and notch corners so appliqués sit flat. A quick backstitch at the start and end of any seam will stop threads from working loose as the garment gets played in and washed.
- Glue + stitch: bond pieces with washable fabric glue while you sew.
- Trim smart: clip seam allowances on curves to reduce bulk.
- Snap support: add a tiny interior patch behind snaps for reinforcement.
- Edge care: seal raw edges with fray check or a fine zigzag to prevent unraveling.
Simple hand embroidery can add signature details without heavy equipment-learn a few stitches like backstitch, satin stitch, and French knots to spell names or create tiny animals. Hoop the area and use a soluble stabilizer beneath stretchy fabric to keep stitches even; secure thread ends with small internal tacking stitches rather than bulky knots for baby comfort. Finish projects with a cold wash on a gentle cycle and air dry to keep colors bright and stitches intact.
| Material | Best for | care |
|---|---|---|
| Felt | Simple, bold shapes | Hand wash |
| Quilting cotton | Detailed motifs | Machine cold |
| Embroidery floss | lettering & texture | Gentle cycle |
Painting Stencils and Fabric Marker Techniques for Crisp Color That Lasts
Start by anchoring your stencil firmly to the cotton or cotton-blend onesie with low-tack adhesive or small pieces of painter’s tape so edges remain razor-sharp. Use a stippling or pouncing motion with a short-bristled brush or a dense foam applicator to push pigment into the weave without bleeding under the cutouts. Apply thin, even layers of textile paint, allowing each pass to dry briefly before adding more-this builds saturated color without the dreaded fuzzy halo. For delicate motifs, feather the edges with a barely-there touch to keep contrasts crisp while still feeling soft against baby skin.
- Prep: Wash and iron the garment first to remove sizing.
- Pressure: Light, consistent taps beat heavy brushing for stencil work.
- Layering: Multiple thin coats stay softer and last longer than one thick coat.
- Heat-set: follow paint and marker instructions- usually, a few seconds with an iron makes the color permanent.
| Tool | Best use |
|---|---|
| Low-tack stencil spray | Keeps stencil snug without residue |
| Dense foam pouncer | Even color, minimal bleed |
| Permanent fabric marker | Fine lines and detail work |
When switching to fabric markers for lettering or tiny accents, practice pressure control on a scrap first: a gentle hand yields thin hairlines, firm pressure creates bold strokes. Blendable pigment markers allow soft gradients and layer colors while still wet, or use a damp brush to pull and soften edges for painterly effects. Always heat-set according to the manufacturer’s directions and wait the recommended cure time before washing; short, cool cycles and mild detergent preserve vibrancy. For extra longevity, consider a clear textile medium or light spray fixative designed for fabrics to lock in color without altering the feel of the onesie.
Safety, Washing, and Storage Guidelines to Keep Custom Onesies Soft and Safe
Keep embellishments and fastenings baby‑proofed by sewing appliqués with tight, reinforced stitches and avoiding loose beads or buttons on garments for infants. Choose non‑toxic, ASTM‑compliant inks and glues, and always allow painted or heat‑set designs to cure fully before the first wear-this reduces chemical residue and helps prints survive repeated washing. For extra security, trim loose threads, check snap closures regularly, and remove any decorative items from onesies intended for early crawlers or toddlers who might mouth fabrics.
When laundering, follow gentle care to preserve softness and safety. Key steps to remember:
- Turn the onesie inside out to protect prints and embroidery.
- Use a mild, fragrance‑free detergent and cold water on a gentle cycle.
- Avoid bleach and limit fabric softener-these can break down adhesives and reduce absorbency.
- Air dry or tumble on low; high heat can warp heat transfers and shrink cotton.
- Spot‑test any DIY paint or glue on a scrap before committing to a full wash routine.
Store garments folded in breathable cotton bins or drawers-avoid vacuum‑sealed bags that can trap moisture and cause odor or mildew. Add natural cedar balls or sachets for gentle scent and pest deterrence, and keep a small laundry label card with each outfit , noting wash preferences. Quick reference table for everyday care:
| Task | Best Setting |
|---|---|
| Water temperature | Cold |
| Machine cycle | Gentle |
| Drying | Air dry or tumble low |
Q&A
Q: Why customize a baby onesie instead of buying pre-made designs?
A: A customized onesie lets you create a personal, one-of-a-kind piece – a keepsake, a themed outfit for a photoshoot, or a practical everyday item that reflects the baby’s personality. It can be more cost-effective for small batches and gives you control over materials and safety.
Q: What methods can I use to customize a onesie?
A: Common methods include heat transfer vinyl (HTV), iron-on transfers, screen printing, embroidery, fabric paint or markers, appliqué, and tie-dye. Each method varies in look, durability, cost, and the time required.
Q: Which customization method is best for a beginner?
A: Start with simple techniques like fabric markers,iron-on transfers, or HTV using a basic heat press or household iron. They’re forgiving, require minimal equipment, and let you experiment before investing in tools like an embroidery machine or screen-printing setup.
Q: What fabric is best for baby onesies?
A: 100% cotton or a high-cotton blend is ideal – soft, breathable, and receptive to most inks, paints, and HTV. For stretchy designs, a cotton-spandex blend works well, but test because stretch can affect vinyl adhesion and printed results.
Q: Do I need to wash the onesie before customizing?
A: Yes. Pre-wash to remove sizing or residues and to pre-shrink the fabric. Don’t use fabric softener before applying most designs, as residues can interfere with adhesion or ink bonding.
Q: How do I place a design so it looks right on a small garment?
A: Consider scale and anatomy: place designs on the chest centered between the neckline and the snaps, or slightly higher for newborn sizes. Keep text large enough to read at close range. For multi-piece outfits, test alignment with a mock-up or on a dress form.
Q: Are there baby-safe inks and materials I should use?
A: Use products labeled non-toxic and suitable for children’s wear. Water-based inks,low-VOC paints, and phthalate-free vinyl are safer choices. Avoid embellishments that could detach (buttons, beads) and always choose soft backing or stabilizers for embroidery against the skin.
Q: How do I make sure appliqués and vinyl don’t peel off in the wash?
A: Follow manufacturer instructions: use the correct temperature and pressure for HTV, allow proper cure time for inks, and use appropriate adhesives and sewing for appliqués. Turn garments inside-out when washing and use low heat for drying to extend life.
Q: Can I put a name or personalized info on a onesie safely?
A: Yes – personalization is a popular option. Avoid printing critical safety info like medical alerts as a substitute for a medical ID. For names, use durable methods (embroidery or high-quality HTV) and ensure letters are securely attached and smooth.
Q: What tools are needed for embroidery on a onesie?
A: For hand embroidery: needles, embroidery floss, an embroidery hoop, and a soft stabilizer behind the fabric.For machine embroidery: an embroidery machine, an appropriate stabilizer, and soft thread. Use thin stabilizers to avoid adding stiffness to the onesie.
Q: Any tips for using fabric paint or markers?
A: Use fabric medium with acrylics to keep them soft, or buy paints formulated for textiles. Sketch your design first, use a stencil if needed, and apply multiple light layers instead of one heavy coat. Cure per product instructions (often by ironing) before washing.
Q: How do I deal with stretch in small sizes when applying vinyl or printing?
A: Use stretch-friendly HTV and inks formulated for stretch fabrics. Place designs across fabric so seams or snap areas don’t stress them. Stabilize the fabric while applying (with a pressing cloth or hoop) and avoid very large, stiff appliqués on highly elastic areas.
Q: Are there safety guidelines about decorations on baby sleepwear?
A: Yes. For sleepwear, avoid loose or raised decorations that can pose a suffocation risk or come off. Follow flammability standards for sleep garments in your region; consider simpler, low-profile designs for pajamas.
Q: How should customized onesies be washed and cared for?
A: Turn inside out, machine wash cold or warm on gentle, use mild detergent, avoid bleach, and tumble dry low or hang to dry. Refrain from high-heat ironing directly on vinyl or embellishments; use a pressing cloth if needed.
Q: Is it better to DIY or order from a professional printer?
A: DIY is great for small runs, experimentation, and a personal touch. Professionals offer consistent quality, access to industrial inks and presses, and faster turnaround for larger batches. Choose based on volume, desired finish, and your comfort with tools.
Q: Any legal or copyright considerations?
A: Don’t reproduce copyrighted characters or logos for sale without a license. For personal gifts, the risk is low, but resale requires permission. Use original designs or licensed artwork for commercial projects.
Q: How can I test techniques without risking a precious onesie?
A: Practice on scrap fabric or thrifted onesies pre-washed the same way. This helps dial in heat/pressure, ink saturation, and color choices before committing to the final piece.
Q: What are common problems and quick fixes?
A: Peeling vinyl – reapply heat and pressure, ensure fabric is clean; cracking printed ink – use softer inks or fabric medium; bleeding paint – let each layer dry and use a barrier underneath; puckering after embroidery – try a lighter stabilizer and adjust hoop tension.
Q: Any creative ideas for themes or layouts?
A: think small-world concepts: milestone dates, simple silhouettes (animals, stars), name monograms, playful pun-based text, or matching sets (parent/child phrases). Keep designs bold and uncomplicated for tiny canvases.
Q: How long does customization usually take?
A: simple iron-ons or HTV can take 10-30 minutes per onesie. Embroidery or screen printing setup takes longer, but multiple garments speed up once set. Paint projects depend on drying and curing time - plan for several hours to a day.
Q: What’s the best way to present a customized onesie as a gift?
A: Include a small care tag with washing instructions, fold neatly in tissue or a box, and add a note about personalization (like the date or name). If it’s a keepsake, consider optional archival-safe packaging.
If you want, I can create a short checklist for a first-time customization project or recommend specific non-toxic products and tools for a chosen method.
Key Takeaways
Customizing baby onesies turns a simple garment into a small canvas for memories, personality, and practical flair. Whether you stick to subtle embroidery, playful fabric paints, or an upcycled appliqué, the techniques you’ve learned can be mixed and matched to suit your aesthetic and your baby’s comfort. Remember to prioritize safety-use non-toxic materials, secure decorations firmly, and follow care instructions so each piece lasts through washes and wiggles. Above all, treat the process as a gentle experiment: start small, iterate, and keep what works. If a tiny outfit brings a quiet smile or becomes a favorite keepsake, you’ve already succeeded.