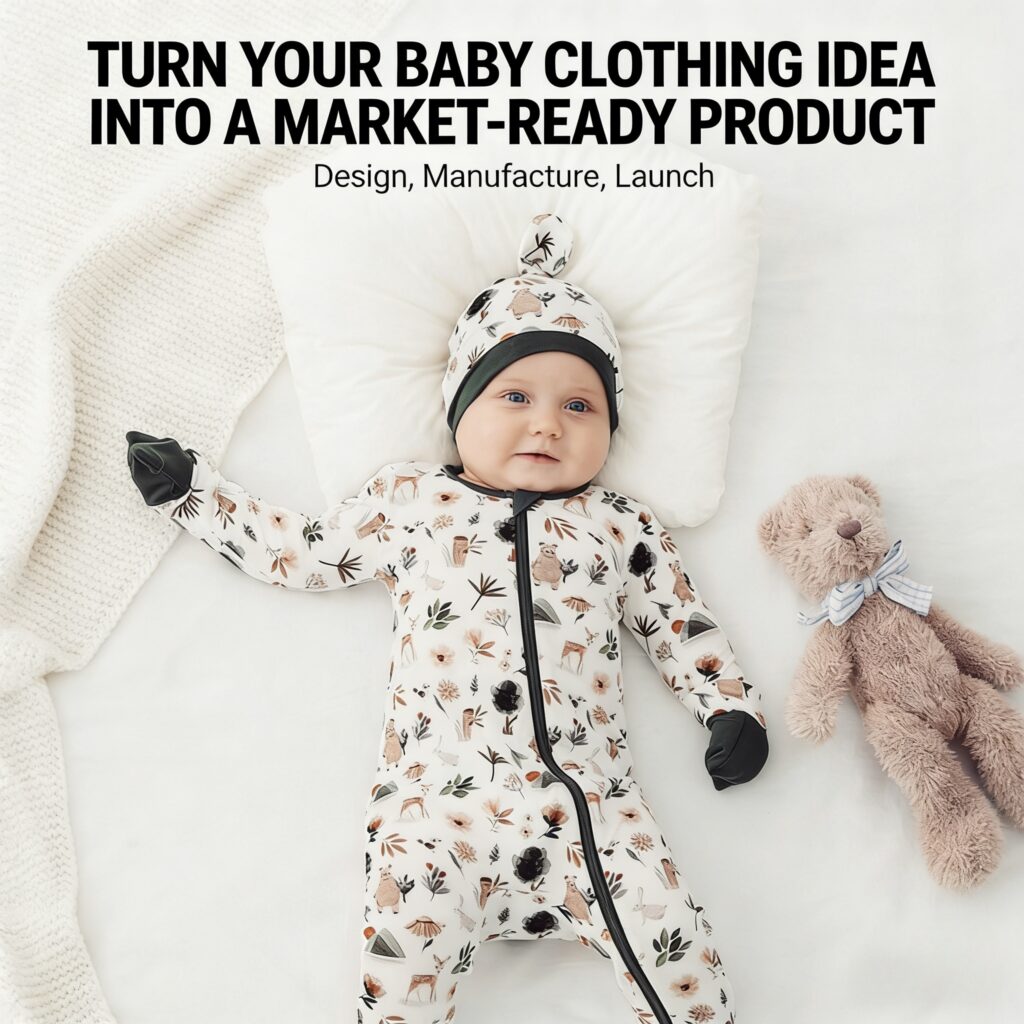
A single sketch folded into the corner of a notebook can grow into a tiny sweater that cradles a newborn’s first days. Turning a baby clothing idea into a finished product is a practical journey that blends creativity, safety standards, and hands-on problem-solving. It requires moving from inspiration to research, design, material choices, prototyping, and production, each step narrowing many possibilities into one reliable garment.
This article guides you through that process in clear stages. You’ll learn how to test your concept against market needs and regulations, translate sketches into technical specifications, select fabrics and trims suited for infants, and evaluate prototyping and manufacturing options. By treating the idea as both a creative seed and a technical project, you can bring a safe, market-ready baby garment from concept to closet.
Table of Contents
- Validate the idea with parent interviews, competitor audits, micro preorders , and price testing to reduce risk
- Design for safety, comfort, and compliance by choosing certified fabrics, child-safe fastenings, and seam techniques that withstand washes
- Build functional prototypes and run wear tests with target families to iterate on fit, durability, and laundering performance
- Source manufacturers strategically, compare minimum order quantities and cost structures, and consider small batch or domestic partners to control quality
- Create a launch plan covering certifications, clear safety labeling, eco-friendly packaging, pricing tiers, and a pre-launch marketing funnel
- Q&A
- To Wrap It Up
Validate the idea with parent interviews, competitor audits, micro preorders, and price testing to reduce risk
Start with real parents, not assumptions. Schedule short, focused interviews-5-10 minutes by phone or at a playground-and ask about routines, pain points, and the last time they bought baby clothes. Listen for words about durability, ease, safety, and price sensitivity, then map those insights directly to features you can prototype. Parallel to that, perform a crisp competitor audit: snapshot their best-sellers, return policies, sizing language, and imagery so you can spot gaps where your product can stand out without reinventing the wheel.
Mitigate risk by testing demand before full production. Launch micro preorders with a small, refundable deposit or limited-run drops to measure conversion and gather first-user feedback on fit and fabric. Combine that with simple price tests-A/B two price points in the checkout or offer a bundle vs single-item option-to learn what parents will actually pay. Use the data to refine material choices, minimum order quantities, and a safe launch price that covers cost and margin.
Make validation fast and measurable: track conversion rate, average order value, and refund requests, then iterate. Below are practical tactics to run this phase quickly, followed by a compact comparison of each validation method.
- Interview blitz: 20 swift parent chats in one week to find recurring language and must-haves.
- Competitor snapshot: Pick 5 competitors and document size charts, materials, and price anchors.
- Micro preorder: Landing page + 30% deposit to test willingness to buy.
- Price probe: Two checkout price points for 2 weeks each to compare conversion.
| Method | Speed | Risk Reduction |
|---|---|---|
| Parent interviews | 1-2 weeks | Understand real needs |
| Competitor audit | 3-5 days | Spot market gaps |
| Micro preorders & price tests | 2-6 weeks | Validate demand & pricing |
 Design for safety, comfort , and compliance by choosing certified fabrics, child-safe fastenings, and seam techniques that withstand washes
When you envision the finished garment, think first about what touches a baby’s skin: choose certified textiles that prove they’ve been tested for harmful substances and maintain a soft hand after repeated laundering. Seek out certifications like GOTS or Oeko‑Tex, prefer pre-shrunk knits and reactive-dyed fabrics for lasting colour, and specify finishes that preserve breathability and pilling resistance. Simple production choices pay off in comfort and longevity:
- Label verification: demand batch certificates and CPSIA documentation.
- Fabric selection: low‑pile, enzyme‑washed cottons or bamboo blends for gentleness.
- Pre‑wash protocols: simulate 30-50 home washes to confirm hand and fit.
- Trim standards: nickel‑free snaps, covered zippers, and break‑away cords.
Fastenings and seams are the unsung heroes of a trustworthy baby product-choose child‑safe hardware and durable stitch techniques to reduce failures in the wash. Use flatlock or double‑needle seams on stretch areas, bartack stress points like crotches and pocket corners, and enclose raw edges to prevent fraying. Below is a quick reference to help align safety and use cases when specifying closures:
| closure | Safety | Durability | Best use |
|---|---|---|---|
| Snap (plastic/metal) | High if crimped and secured | Very durable | On‑body openings (onesies) |
| Covered zipper | High with guard flap | High if coil zipper | Outerwear, sleep sacks |
| Button | Lower unless sewn with security | Moderate | Decorative only |
| Hook & loop (Velcro) | Moderate; avoid near the face | Moderate; attracts lint | Adjustable closures, bibs |
Document these choices in your tech pack: call out stitch type, thread tension, seam allowance, and wash specs so manufacturers can replicate the performance. A small investment in certified materials and child‑safe detailing up front makes the difference between a prototype and a product parents will trust.
Build functional prototypes and run wear tests with target families to iterate on fit, durability , and laundering performance
Start with a wearable sample that moves beyond paper patterns - a functional mock-up made from production-weight fabrics and the intended trims. Bring that sample into the real world: invite a small group of target caregivers and babies for short, supervised wear sessions to observe how the garment performs during dressing, crawling, feeding, and napping. Capture both objective notes (ease of snap/button closure, sleeve length during reach) and subjective impressions (comfort, perceived safety). Iterate quickly by adjusting pattern pieces, pocket placement, and seam allowances, then validate each change with another round of wear trials.
Durability and laundering are as important as fit. Run simple, repeatable wash/dry cycles with participating families and track outcomes like shrinkage, colorfastness , and seam integrity. Use an observational checklist and a few key metrics to decide whether a fabric or construction method needs strengthening. Sample checklist:
- Closure stress – snap/button retention after 10 washes
- Dimensional change – percent shrinkage after 5 washes
- Surface wear – pilling/fuzzing score
| Prototype | Fit tweak | Wash result |
|---|---|---|
| v1 | Wider crotch, longer cuff | 3% shrink, snaps loosen |
| v2 | Reinforced snaps, added gusset | 1.2% shrink, no seam failure |
| v3 | Optimized sleeve length | Stable color, durable trims |
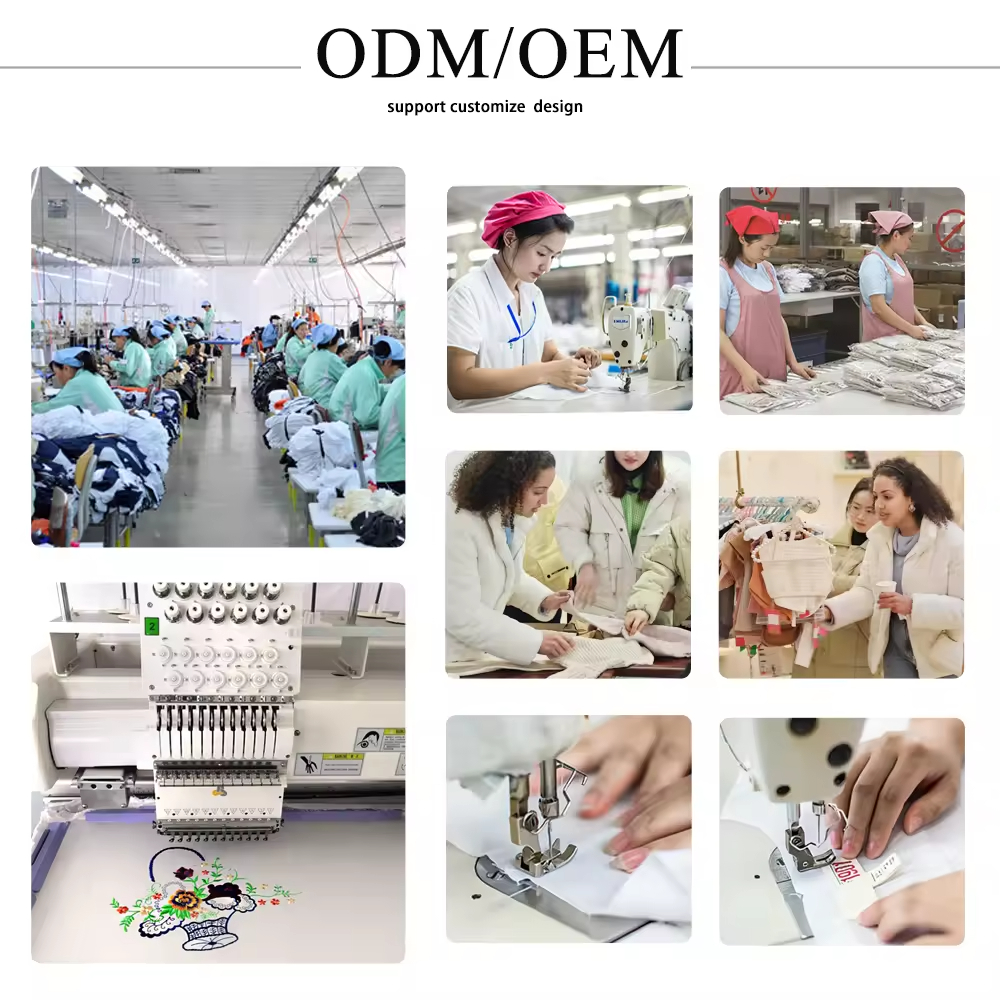
Source manufacturers strategically, compare minimum order quantities and cost structures and consider small batch or domestic partners to control quality
Finding the right factory is part detective work, part negotiation. Start by mapping your real needs-fabric type, finishing, and expected retail price-and use those as lenses when you review quotes. Compare not just the per-piece price but the minimum order quantity (MOQ), tooling or setup fees, and payment terms. Request clear lead-time estimates and ask for cost breakdowns (materials, labour, overhead) so you can model how price changes with volume; this makes it easier to spot hidden charges and decide whether to absorb or pass costs to customers.
For many baby clothing lines, controlling fit and finish is worth a slightly higher unit cost. Consider a phased approach: an initial small-batch run with a domestic partner or specialty maker, then scale to larger overseas production once patterns and trims are locked. Practical steps include:
- Order samples from multiple factories to compare quality directly.
- Negotiate MOQs or propose split production across colors to lower upfront inventory.
- Use short pilot runs to catch fit and wash issues before full production.
- Include third-party quality checks or on-site visits in contracts.
| Partner Type | Typical MOQ | Cost/Unit | Best For |
|---|---|---|---|
| Large Overseas Factory | 500+ | Low | High-volume basics |
| Domestic Small Batch | 50-200 | Medium | Premium, fast iterations |
| Local Atelier | 1-50 | High | Hand-finished, custom |
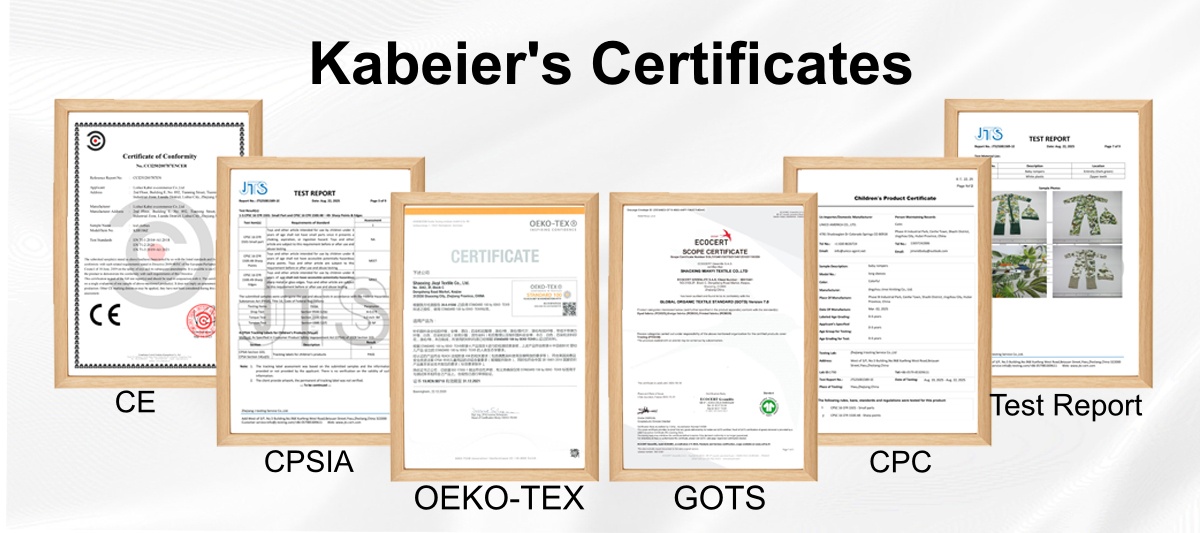
Create a launch plan covering certifications, clear safety labeling, eco-friendly packaging, pricing tiers , and a pre-launch marketing funnel
Map out the regulatory roadmap early: secure relevant certifications such as CPSIA for U.S. safety, OEKO‑TEX or GOTS for textile purity, and check regional labeling laws so every seam and snap meets expectations. Design labels that clearly communicate size, fiber content, washing instructions, and any safety notes. Use durable, readable tags and include a removable hangtag for gift buyers. For packaging, prioritize low‑impact materials: recycled cardboard, compostable mailers, soy‑based inks , and a minimalist insert that doubles as a care card. These decisions aren’t just compliance- they’re trust signals that show parents you thought of safety, sustainability, and usability from day one.
Set up simple pricing tiers that reflect value and lifetime wear: a basic entry product, a midline essentials bundle, and a premium line with organic fabrics or limited prints. Use a concise pre‑launch funnel to convert curiosity into committed buyers. Build a waitlist landing page, offer early‑bird bundles, seed product with micro‑influencers, and run a short email drip that shares behind‑the‑scenes trust content and safety credentials. Examples of pricing structure and funnel steps are below to use as a starting checklist.
- Label checklist: size, materials, wash, safety icons
- Packaging checklist: recyclable, compact, branded care card
- Funnel checklist: waitlist → sample seeding → drip emails → targeted launch ads
| Tier | What it includes | Price (USD) |
|---|---|---|
| Starter | Single piece, basic colors | $18 |
| Essentials | 3‑pack bundle, care card | $50 |
| Premium | Organic fabric, gift box | $85 |
Q&A
Q: What’s the first thing I should do when I have a baby clothing idea?
A: Clarify the idea: who is it for (age range, parents’ values), what problem it solves (easy diaper changes, temperature regulation, hypoallergenic), and what makes it different. Then do quick market scanning-search existing products, read parent forums, and check social media-to confirm demand and spot gaps you can fill.
Q: How do I validate that parents will actually buy my design?
A: Run low-cost tests: share sketches or mockups on social media, create a simple landing page, or sell a small pre-order run. Collect feedback via surveys or prototype trials with parent testers. Pre-orders and waitlists are the fastest ways to measure real interest without a large upfront investment.
Q: What are the key design elements for baby clothing?
A: Prioritize safety, comfort, and practicality. Choose soft, breathable fabrics; avoid long drawstrings, small detachable parts, or rough seams; design for easy dressing and diaper changes. Also, think about visual identity, color palette, prints, and size range, so your product is distinctive yet functional.
Q: What is a tech pack, and why do I need one?
A: A tech pack is the blueprint manufacturers use: detailed sketches, measurements, fabric and trim specs, stitch types, labels, and construction notes. It reduces errors, controls costs, and speeds up sampling. Even for small makers, a clear tech pack saves time and money.
Q: How do I choose fabrics and trims suitable for babies?
A: Look for soft, breathable, and durable materials (cotton, organic cotton, bamboo blends, modal). Check for Oeko‑Tex or GOTS certifications if you want a verified low-chemical or organic status. Choose safe, durable trims (snaps rather than buttons for newborn sizes) and test for pilling, shrinkage, and colorfastness.
Q: What safety standards and regulations apply to baby clothing?
A: Safety rules vary by market. In the U.S., be aware of CPSIA requirements (lead and phthalate limits) and flammability regulations; in the EU, consider REACH and EN standards. Pay attention to restrictions on drawstrings, choking hazards (small parts), and mandatory labeling. Always check the current regulations for your sales region and consider third‑party testing for compliance.
Q: How do I move from sketch to a physical prototype?
A: Steps:
– Create a detailed tech pack or spec sheet.
– Make or commission a pattern (hand-drafted or digital).
– Produce a toile/muslin for fit.
– Sew a first sample and run fit sessions with babies/parents or mannequins.
– Iterate the pattern and make additional samples until fit, construction, and materials are right.
Q: How many prototype rounds are normal?
A: Typically 2-4 rounds: a toile to test basic shape, a sample in chosen fabric for fit and feel, a production-ready sample to finalize construction, and sometimes a pre-production sample to confirm manufacturing details. More rounds might potentially be needed if the design is complex.
Q: How much will prototyping and sampling cost?
A: Costs vary widely: a single handmade sample might be $30-$200; professional patterns or graded samples cost $100-$500 each; lab-tested safety samples cost more. expect to budget several hundred to a few thousand dollars before production, depending on complexity and whether you use domestic or overseas services.
Q: Should I manufacture locally or overseas?
A: Consider trade-offs:
– Local: lower lead times, easier interaction, smaller minimum orders, higher cost per unit, and easier quality control.
– Overseas (e.g., Asia): lower unit cost, higher moqs, longer lead times, potential language/culture barriers, and unexpectedly higher shipping/import costs.
Start where you can control quality and cash flow; many brands begin with local or small-batch makers, then scale overseas.
Q: What is an MOQ, and how does it affect me?
A: MOQ (minimum order quantity) is the smallest number of pieces a factory will produce per style, color, or size. MOQs for overseas factories can be 300-1,000 units per color; smaller or domestic makers may accept much lower quantities. MOQs affect inventory costs, cash required, and risk-plan initial runs conservatively.
Q: How long does it take to go from idea to finished product?
A: Rough timeline:
– Ideation and research: 1-3 weeks
– Design and tech pack: 1-4 weeks
– Sampling and iterations: 4-12 weeks
– Production lead time: 6-16 weeks (depends on factory and season)
Total: commonly 3-6 months for a smooth small‑scale launch; complex lines or overseas production can take longer.
Q: What kind of testing does baby clothing need?
A: Practical testing (fit, wash/wear) and safety testing (chemical tests, flammability, mechanical tests for small parts). Consider laundering tests for shrinkage and colorfastness, wear tests with parents, and formal lab testing if you plan to scale or sell in regulated markets.
Q: How do I find reliable manufacturers and suppliers?
A: Use multiple channels:
– Industry directories and trade shows
– Online B2B platforms (with caution)
– referrals from other brands or local sewing collectives
– Social media and maker communities
Always request references, check prior work (photos, samples), visit if possible, and start with a small order or trial production.
Q: What should I include on labels and packaging?
A: Labels typically need fiber content, care instructions, size, country of origin, and brand identifiers (e.g., RN in the U.S.). Packaging should protect the garment and reflect your brand-consider eco-friendly materials and clear return instructions. Confirm local labeling laws for exact requirements.
Q: How do I price baby clothing to be profitable?
A: Calculate all costs: materials, trims, sample progress, labor, packaging, labeling, testing, shipping, duties, marketing, and overhead. Add your desired margin and market positioning. A common wholesale-to-retail markup is 2-2.5x (keeps retail price attractive while covering wholesale margins), but pricing should also reflect brand positioning and competitor rates.
Q: How can I make my baby’s clothing durable and safe without breaking the bank?
A: Start small with targeted choices: use OEKO‑TEX or GOTS certified fabrics for key items, use minimal packaging, and reduce waste by producing small batches. Source deadstock fabrics or certified blends, and clearly communicate sustainable choices to parents who value them. Sustainability can be built in stages as cash flow permits.
Q: What are the most common pitfalls to avoid?
A: Common mistakes:
– Skipping market validation and overinvesting in a design that won’t sell
– Poor tech packs that cause sampling errors
– Underestimating lead times and cash requirements
– Ignoring safety regulations or testing
– Choosing a factory solely on price without checking quality or reliability
– overcomplicating initial collections-simpler is easier to produce well
Q: Any quick tips for launching and scaling?
A: Launch with a small, coherent capsule that showcases your unique value. Use pre-orders to manage cash and gauge demand. Collect customer feedback and track returns/issues closely. When scaling, standardize spec sheets, build relationships with multiple suppliers, and invest in quality control processes.
Q: Where can I get help if I’m not a designer or manufacturer?
A: Options:
– Hire freelance pattern makers, tech pack creators, or fit models
– Partner with local sewing studios or sample makers
– Work with fashion or small-batch production consultants
– Join maker and entrepreneur communities for mentorship and resource sharing
Q: Final checklist before placing a production order?
A: Yes, confirm:
– Approved production-ready sample
– Complete tech pack and size grading
– Final material and trim suppliers locked in
– Confirmed price, MOQ, lead time, and payment terms
– Quality control plan and inspection points
– Required safety testing and labeling compliance
– Shipping, duties, and packaging logistics planned
If you want, I can tailor this Q&A to a specific market (U.S./EU/UK), provide a sample tech pack checklist, or draft a simple production timeline with estimated costs for a specific style. Which would help most?
To Wrap It Up
From first sketch to final seam, bringing a baby clothing idea to market is a journey of small, purposeful steps—research, prototyping, testing, production, and promotion. Keep the infant’s comfort and safety at the center of every decision, document what you learn, and let user feedback shape each revision. Whether you work with a local maker, a contract manufacturer, or launch a small run yourself, plan for quality control, clear labeling, and the logistics of packaging and distribution.
You don’t need perfection at the start; thoughtful iteration and attention to standards will turn your concept into a product families can trust. If you’re ready to move from idea to production, partner with Kabeier—a baby clothing manufacturer with over 20 years of experience in OEM and ODM services. From design support and fabric selection to custom labels, packaging, and bulk production, Kabeier helps bring your babywear ideas to life with professional craftsmanship and reliable manufacturing.